USB Phishing Campaign
Table of Contents
- Introduction
- Downloading and Using the Provided File(s)
- Getting Phishing Campaign Results
- Deleting a USB Campaign
Introduction
A USB Phishing Campaign is similar to a regular email phishing Campaign, except that the phishing is conducted using removable media.
Infosec IQ provides you with a phishing file which you can place on removable media such as a USB thumb drive before leaving the media in a location where a learner may find it. Upon being opened by a learner, the file stored on the removable media will request a small image from the Infosec IQ servers, which serves to record that a file from your USB Phishing Campaign was opened.
If the learner chooses to enable macros for the file, the hidden macro will gather login name and IP address data. This captured data is securely sent to the Infosec IQ database and can be viewed through your USB Phishing Campaign page.
To use this functionality, navigate to the USB Campaign under the PhishSim tab.
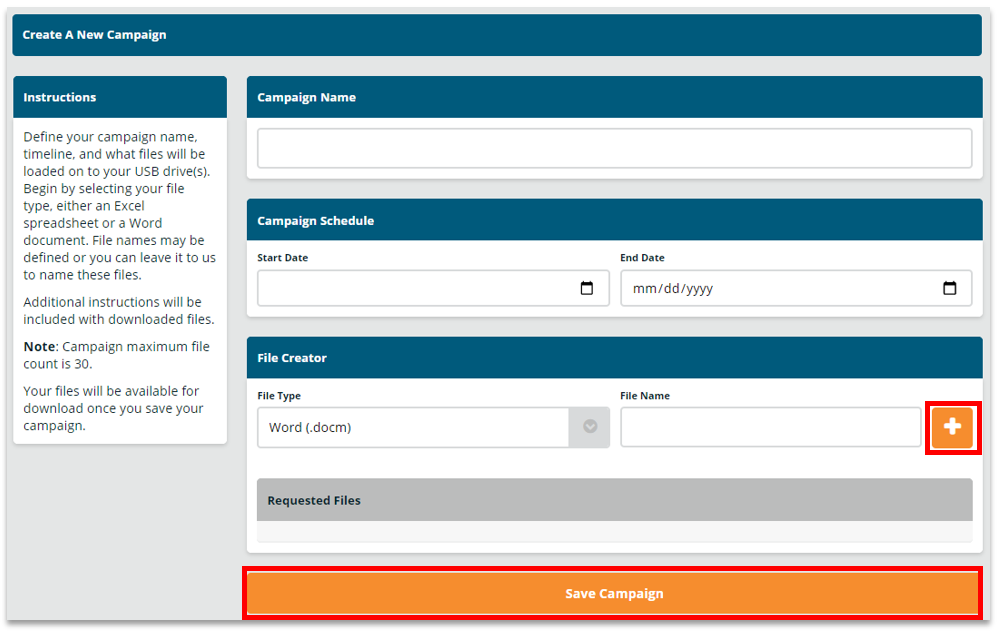
Creating a USB Phishing Campaign
- Click the New USB Campaign button.
- Name your campaign and choose a Start Date and an End Date to define when the campaign will run.
- Choose the type of file you would like to use, and give this file a name.
- Click the + icon to add the defined file to the campaign. Once added, files will appear in the Requested Files section. You can remove files from the campaign by clicking the X icon.

Downloading and Using the Provided File(s)
Follow the steps below to download and use files for USB Phishing Campaigns.
- After creating a USB Campaign, hover over the desired Campaign and click the Download icon.
- You will download a .zip folder that contains the phishing files defined in the Campaign and a .html document with further instructions about the USB Phishing process.
- Extract the malicious file(s) from the .zip folder and place them on your choice of removable media.

Note: You can place a malicious file on more than one removable media object, allowing you to phish multiple users. Because this type of campaign may only return limited information, it may be helpful to name files in a way that allows you to identify the location where the file’s removable media was placed.
- Leave the media in a location where it is likely to be discovered by a learner, and monitor the USB Phishing Campaign to see if the file has been accessed and/or if macros have been enabled for the file.
Getting Phishing Campaign Results
Follow the steps below to view the results of file access and macro enablement for a USB Campaign.
- To view Campaign details, hover over the desired Campaign and click the Details icon.
- The resulting page will display each file associated with the Campaign, as well as information about how many times the file has been accessed and how many times macros have been enabled for the file.
- To view information relating to macro events, hover over the desired file and click the Detail icon. You will be able to see the information collected from the victim’s machine by the file macro.


Deleting a USB Campaign
To delete a Campaign, hover over the desired Campaign and click the Delete icon.
Note: Be careful when deleting USB Phishing Campaigns, as there is no confirmation required to delete a Campaign once the Delete icon is clicked. Deleting a USB Campaign will delete all associated data.